Sealants are mainly used for the waterproof sealing of various deformation joints, construction joints and expansion joints. We must get familiar with sealant construction procedures in practice to maximize its function and ensure the excellent waterproof sealing performance of the project.
Sealant construction shall be performed in accordance with the following steps.
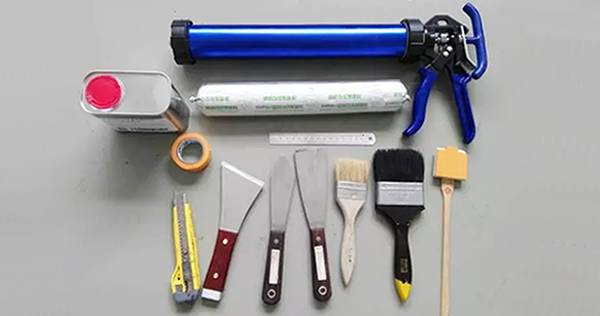
1.Prepare the tools you need.
Before construction, prepare all materials and tools you need for construction such as glue gun, ruler, knife, scraper, brush, blade, masking tape and primer.
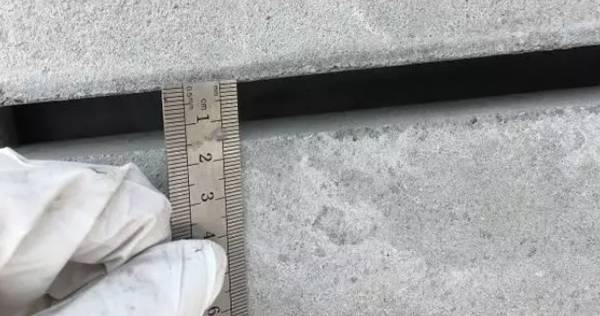
Confirm the joint conditions.
Check if the joint narrows down because of cement mortar or foam material blockage. If there is any blockage, clean it away. Measure the joint width to determine the sealing depth. Reasonable joint widths allow the sealant get fully filled to make sure it can withstand the displacement, maintain its excellent adhesion, durability and prevent incomplete curing.
Clean the construction surface.
Dust, adsorbed oil, moisture, rust and cement slurry and other substances may exist in building joints. These substances will have a bad influence on the sealant adhesive properties and the sealing performance, and need to be removed. Generally, you may choose a wire brush or sandpaper for the first cleaning. If there is gathering dust, you may use a blower to blow it off. And then use a brush to conduct the second cleaning to remove the dust. The cleaned substrate surface must be clean, dry and even.
Fill in the backup materials.
When choosing backup materials, you must take the joint size deviation into consideration. Generally, the width of the backup materials shall be 20% – 30% larger than that of the sealing joint. If the backup materials are wetted by rain or snow after filling. Refill or dry it thoroughly.
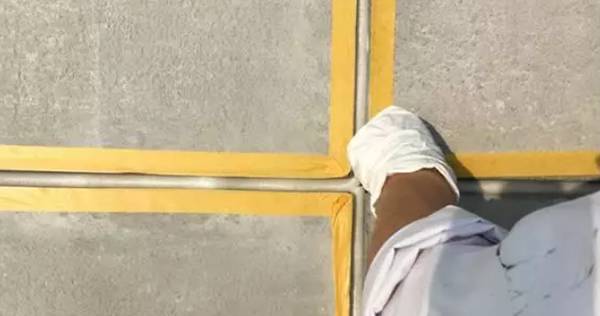
Paste masking tapes.
Apply the masking tape to the specified location before applying the primer to prevent surrounding pollution during the construction, facilitate decoration and beautify the construction surface.
Apply the primer.
Apply the primer to both sides of the cement substrate. Priming can enhance the stability of the porous substrate surface, reduce the influence of dust on the sealant adhesive properties and prevent adherend components like water and alkaline substances from migrating to the sealant layer. Furthermore, it can also prevent other substances from reacting with the sealants and affect its adhesive properties.
7.1 Mix the sealant.
If choosing a single-component sealant, you can ignore this step and fill the sealant directly.
If choosing a two-component sealant, you can mix it as follows. The sealant consists of the base paste component A and the vulcanization paste component B. Mix the two components with the ratio of 10:1 and stir the sealant evenly with mechanical or manual methods.
When the mixing is finished, check if the sealant is uniform. Scrape the polysulfide sealant into a thin layer with a putty knife. If there are no colorful spots or stripes, it is considered to be uniformly mixed. Prepare an appropriate amount of polysulfide sealant to ensure it can be used up within its lifetime (usually 2–6 h).
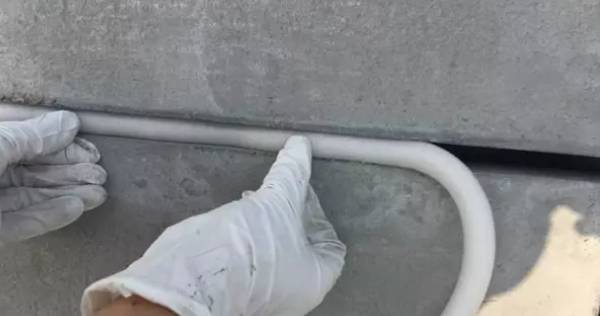
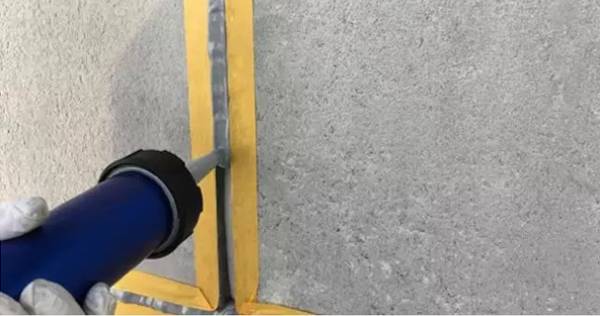
7.2 Fill the sealant.
The diameter of the glue nozzle shall be less than the width of the sealant injection joint. When applying the sealant, make sure the glue nozzle is placed at the bottom of the joint. The sealant shall be injected slowly, continuously and evenly to ensure that the joint is filled with sealant and prevent air bubbles or cavities arising from moving too fast. Special attention must be paid to prevent air bubbles when applying the sealant to cross seams and edges.
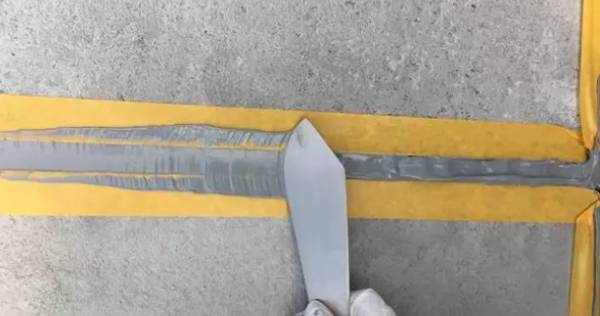
Finish the joint.
When the sizing is completed, press the sealant applied in the opposite direction of the sizing with a scraper, and then press it again in the opposite direction.
Perform final treatment.
Remove the masking tapes immediately after finishing. Remove the sealant sample adhering to the construction site with solvents before curing, and clean the construction site.
Matters Need Attention
To ensure get better bonding effect and give full play to sealant's excellent performance, the following matters shall be noted during the joint sealing construction: